84 HOME INSTRUCTIONS
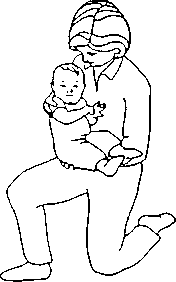
Good Positioning for Carrying—1
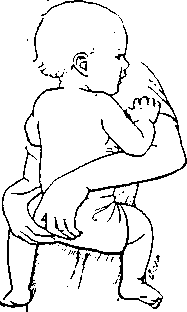
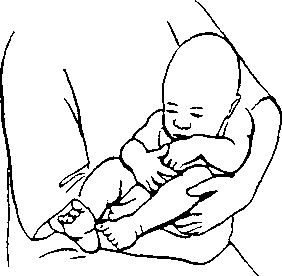
Figure 1
Place child in a curled-up position with shoulders forward and hips flexed. Place arm behind head, not behind neck.
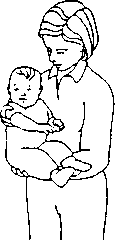
Figure 2
Place child facing you with child's legs around your hips. Hold under buttocks.
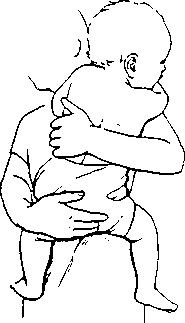
Figure 3
Hold child as in Figure 2, but with one hand on child's buttocks and the other hand on child's back.
85 HOME INSTRUCTIONS
Good Positioning for Carrying—2
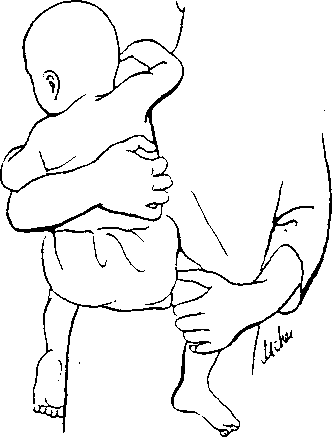
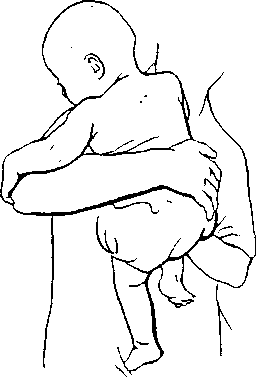
Figure 1
Place child over one hip with one hand on child's back and other hand on child's leg.
Figure 2
Hold child with head over your shoulder so that child has to support it. Hold one leg bent while th other is allowed to hang straight down.
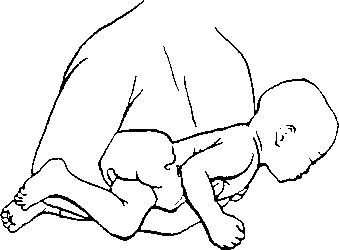
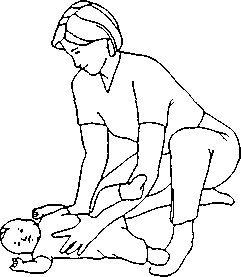
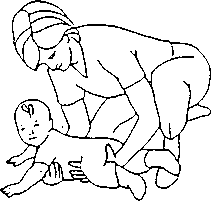
Figure 3 Figure 4
Place child on stomach, lying with your arm placed between the legs and your hand under the chest.
86 HOME INSTRUCTIONS
Pulling on Shirt—Prone on Lap
Purpose
To allow easier dressing without child becoming stiff
Instructions
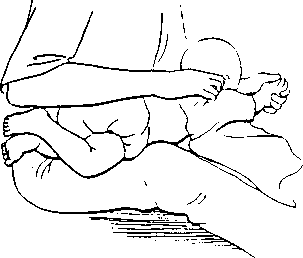
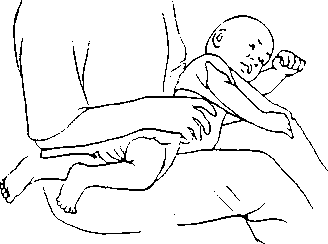
1. Place child on stomach, lying on your lap (see Figure 1).
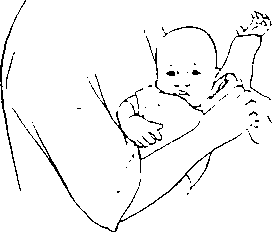
2. Hold the more involved arm above the elbow. Arm should be extended over head. Pull sleeve over arm (see Figure 2).
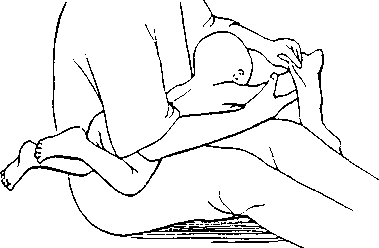
3. Slowly roll child over on back by pulling backward on "top" hip and supporting "lower" arm and trunk . Arms should be forward (see Figure 3).
4. Raise sleeveless arm above head. Pull sleeve over arms (see Figure 4).
Desired Response
Child will remain relaxed.
Undesired Response
Child will become stiff and dressing will be more difficult.
87 HOME INSTRUCTIONS
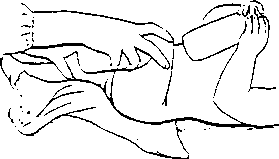
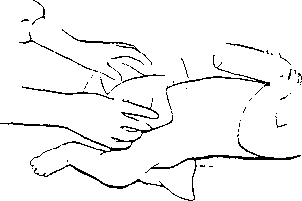
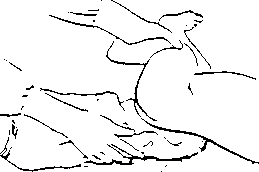
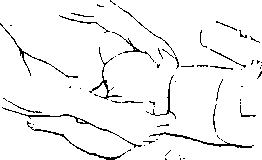
Changing Diapers
Purpose
To enable child to relax while diapering and to make diapering easier
Instructions
To remove diaper:
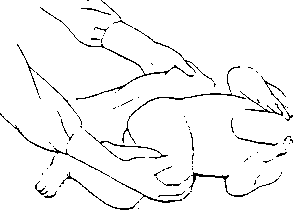
1. Place child on back. Rotate hip and leg to one side, pull diaper partially out (see Figures 1 and 2) .
2. Rotate the other hip and leg and pull diaper completely out (see Figure 3).
To diaper:
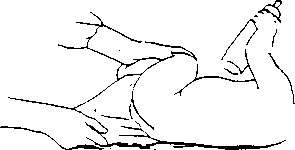
1. Place child on back. Rotate hip and leg to one side; place diaper under hip (see Figure 4).
2. Rotate hip and leg to other side, adjust diaper.
3. Pull together and pin (see Figures 5 and 6).
Desired Response
Child will remain relaxed while being diapered.
Undesired Response
Child will become stiff or legs will pull together, making diapering difficult.
88 HOME INSTRUCTIONS
Leg Control Wrap
Purpose
To position legs that are flopped out to the side.
Instructions
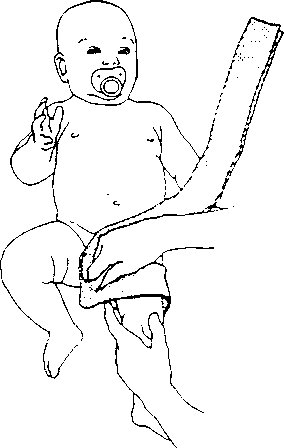
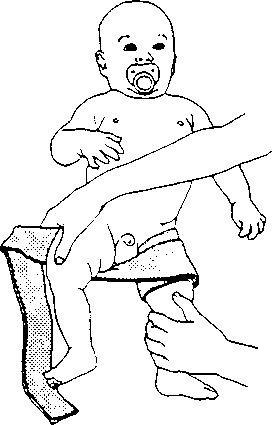
1. Fold a 4" Ace bandage in half lengthwise.
2. Place end of bandage under the top of child's left leg with rolled edge on top (see Figure 1).
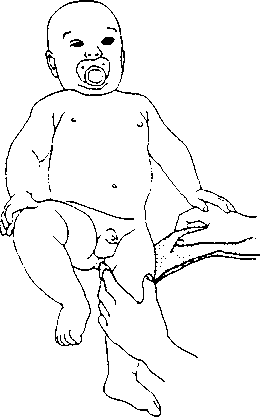
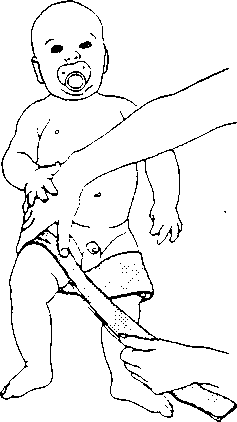
3. Wrap bandage over top of left leg (see Figure 2).
4. Wrap bandage (firm but not tight) around left leg again, over top of previous wrap (see Figure 3)-
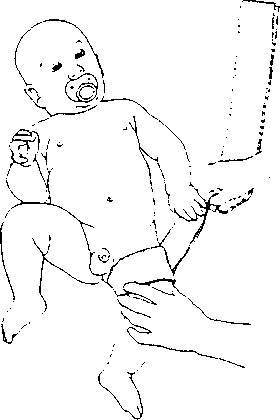
5. Bring bandage under right leg (see Figure 4) and over top (see Figure 5).
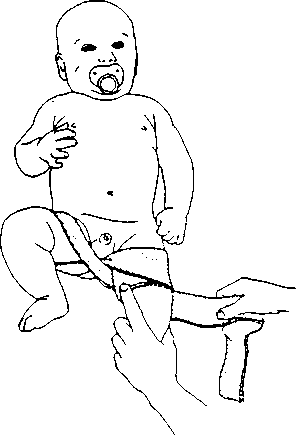
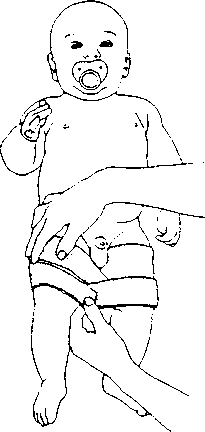
6. Wrap bandage under left leg and around the top, overlapping approximately one third of previous wrap (see Figure 6).
7. Wrap bandage under right leg and around the top, overlapping previous wrap (see Figure 7).
8. Repeat steps 6 and 7 until the bandage extends below knees. Pin ends of bandage.
Precautions
The bandage should not be wrapped tightly. The legs do not need to be positioned in full extension. As the legs loosen, the lightly wrapped bandage will hold them in.
89 HOME INSTRUCTIONS
Lifting a Small Child from the Floor
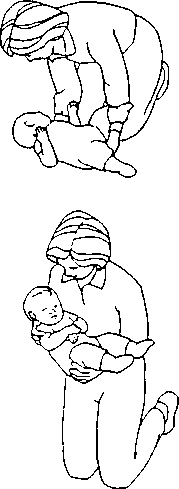
Kneel at the child's side. Place one arm under the child's thigh, and curl the child's legs up.
Place your other arm around the child's shoulder, and curl the head and shoulders up.
Lift the child up and into a sitting position. Bring the child close to you.
Bring one of your legs forward.
Lifting a Small Child from the Floor — Alternative Method
Moving to Sidelying
Child on Back
Squat down on one knee beside the child.
Place one arm between the child's legs, with the palm of your hand on child's stomach.
Place your other hand behind the child's shoulder.
Roll the child to one side.
Child on Stomach
Place one arm between the child's legs, with your hand on the child's stomach.
Place your other hand under the child's chest.
Roll the child to one side.